Introduction
Makeup can be fun, but without proper organization, it quickly becomes overwhelming. Brushes, lipsticks, palettes, and skincare items can clutter your space and make your morning routine stressful. Learning how to organize your makeup like a pro can save time, protect your products, and keep your vanity looking stylish. Whether you’re a beauty beginner or a seasoned makeup lover, these strategies will help you achieve an orderly, functional setup.
Why Organizing Makeup Matters
Having a well-organized makeup collection is more than just aesthetics. It helps you find products quickly, prevents items from getting damaged, and keeps your routine efficient. Disorganized makeup can lead to expired products, wasted money, and even skin issues if hygiene is compromised. A neat setup also encourages creativity because you can see all your options at a glance.
Assess Your Collection First
Before organizing, you need to know what you own. Take everything out of drawers, bags, and cabinets. Sort products into categories: foundation, lipsticks, eyeshadows, brushes, skincare, and tools. Check expiration dates and toss any old or unusable products. This step prevents clutter and ensures you’re only working with products you actually use.
Choose the Right Storage Solutions
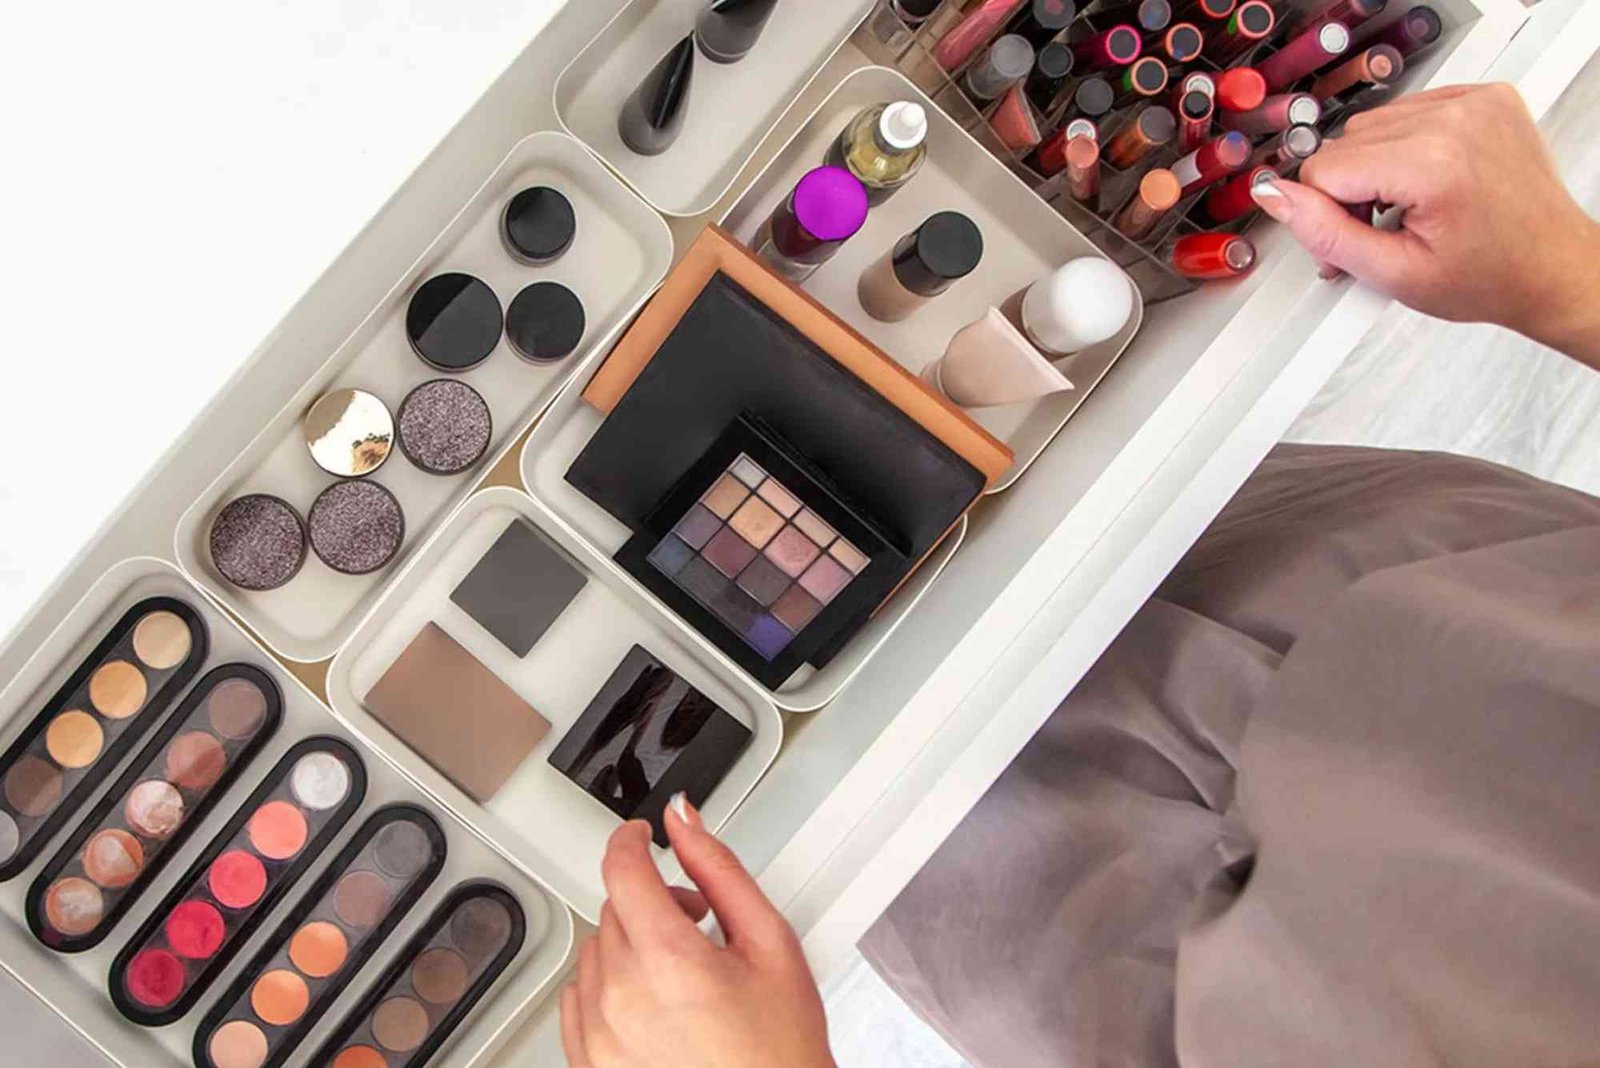
The way you store your makeup can make a huge difference in accessibility and longevity. Professionals often use a combination of clear organizers, drawers, and trays. Clear acrylic organizers are ideal for small items like lipsticks, eyeshadows, and mascaras because they allow you to see everything. Drawers with dividers are perfect for larger palettes or skincare products. If counter space is limited, rotating carousel organizers can maximize vertical space efficiently.
Drawer Dividers
Drawer dividers are a game-changer for keeping products separated. Adjustable dividers can create custom spaces for each category. For example, you can dedicate one section to liquid foundations, another to powders, and a separate area for tools. This prevents products from shifting and makes everything easy to grab.
Acrylic Organizers
Acrylic organizers come in multiple sizes and shapes. Small compartments work well for lipsticks and eyeliners, while larger sections can hold palettes or brushes. Some even have angled slots so your makeup faces forward, giving a professional, boutique-like look.
Vertical Storage
If you have limited space, vertical storage is essential. Rotating carousels, tiered trays, or wall-mounted racks allow you to stack products without crowding your countertop. Vertical storage is also visually appealing and helps you see your entire collection at once.
Categorize and Label Your Makeup
Professional makeup artists organize their kits by category and function. Group similar products together and consider organizing by color, texture, or frequency of use. For instance, everyday items should be easily accessible, while special occasion products can be stored separately. Labeling drawers or compartments can prevent confusion and maintain order over time.
Use Containers for Small Items
Tiny items like eyeshadow singles, lip liners, and gel eyeliners can easily get lost. Small containers, jars, or magnetic palettes are excellent for these. Magnetic palettes allow you to remove product pans from bulky packaging and store them compactly. Using containers not only keeps things tidy but also protects fragile products from breaking.
Organize Brushes and Tools Separately
Makeup brushes, sponges, and tools need their own space to stay clean and last longer. Use cups or holders for brushes and separate sponges into a clean, ventilated container. Never mix dirty brushes with clean ones, as this can spread bacteria and affect skin health. Consider organizing brushes by type: face, eyes, and lips. This makes your routine faster and more hygienic.
Maintain Hygiene While Organizing
Keeping makeup organized is also about hygiene. Clean your brushes and tools regularly, wipe down containers, and avoid storing products in humid areas like bathrooms. Using drawer liners or protective mats can prevent spills and stains. A clean setup not only looks professional but also reduces the risk of skin irritation.
b
Organization is an ongoing process. To maintain your setup:
- Return products to their designated spot after each use.
- Keep a small “daily essentials” tray for items you use most.
- Reassess your collection every few months to remove expired products.
- Rotate seasonal items, storing off-season makeup separately.
These simple habits prevent clutter from building up again and keep your routine efficient.
Create a Stylish Makeup Station
A professional-looking makeup station doesn’t have to be expensive. Choose organizers that match your decor, and consider adding a mirror with good lighting. Personal touches like a small plant, decorative tray, or color-coordinated containers make your setup inviting and motivating. The goal is to create a space that’s functional yet visually pleasing.
Organizing your makeup like a pro saves time, protects your products, and makes your beauty routine more enjoyable. By categorizing items, choosing the right storage solutions, and maintaining hygiene, you can achieve a clean, efficient setup that inspires creativity. Start today by assessing your collection and investing in organizers that fit your needs.
Take action now: sort your makeup, toss expired products, and create a system that works for you. Your morning routine will never feel chaotic again.
FAQs
How often should I clean my makeup brushes?
Ideally, wash face brushes once a week and eye brushes every two weeks. Regular cleaning prevents bacteria buildup.
What’s the best way to store lipsticks?
Use a clear organizer or a small container. Store upright for easy visibility and quick access.
How can I save space in a small vanity?
Use vertical organizers, drawer dividers, and rotating carousels to maximize space efficiently.
Should I organize makeup by color or type?
Both methods work. For efficiency, organize by type first, then by color within each category.
How do I know if makeup is expired?
Check the product’s expiration date or the Period After Opening (PAO) symbol. Discard any product with a strange smell or texture.